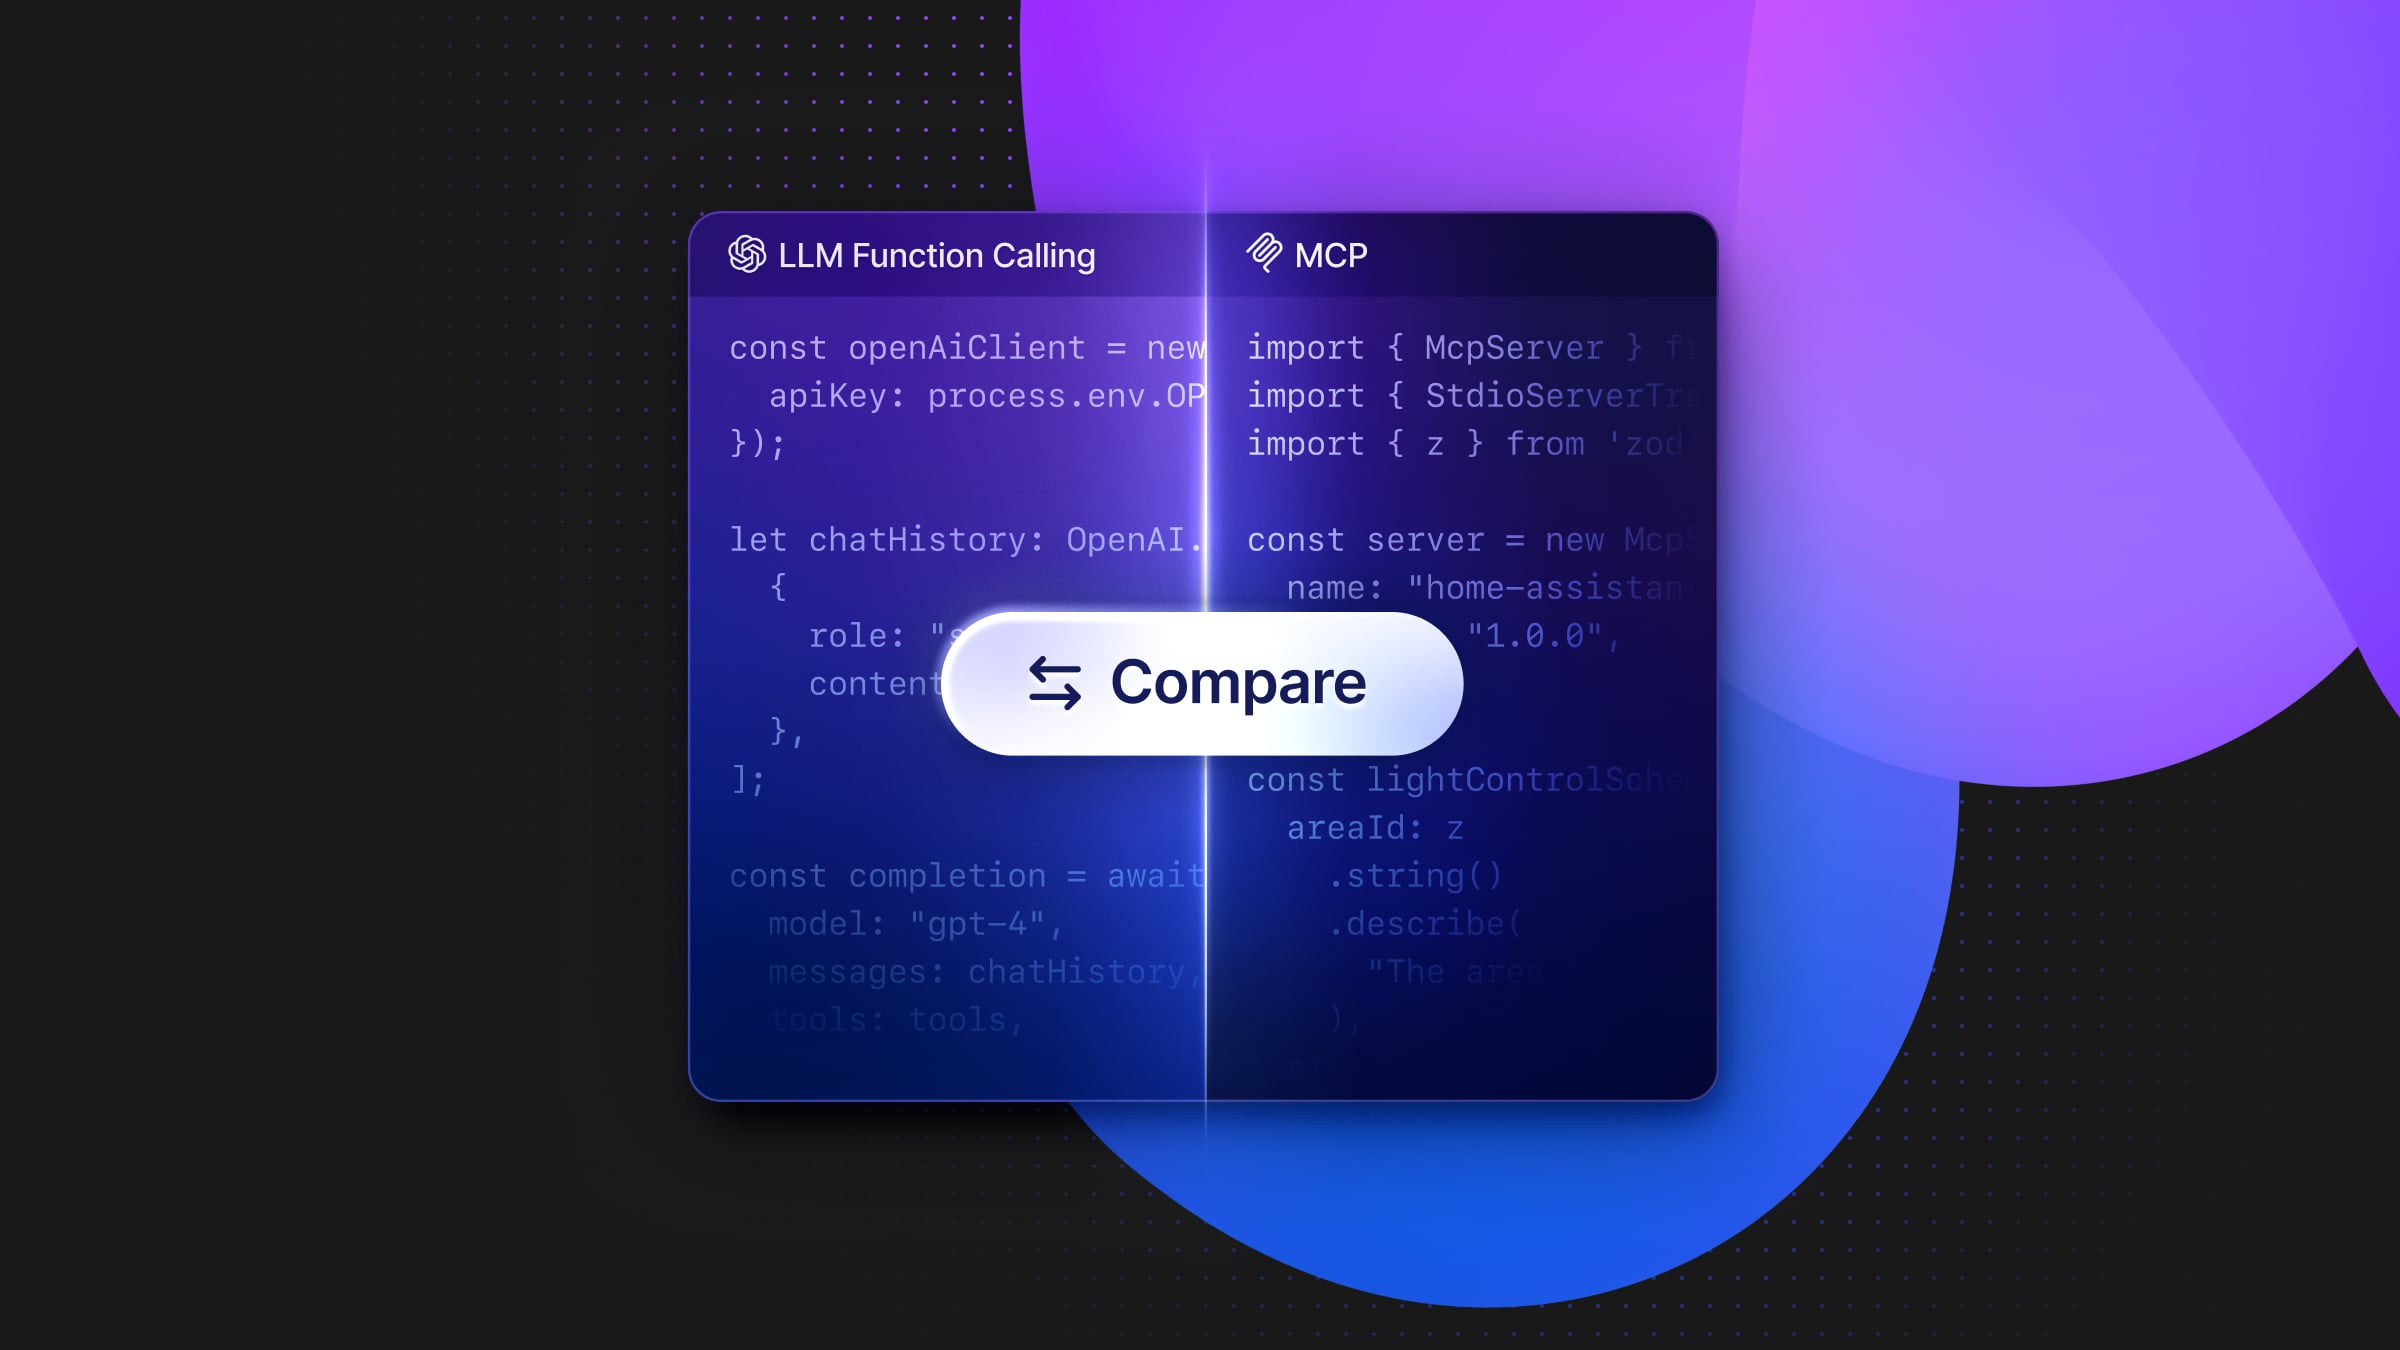
What’s MCP all about? Comparing MCP with LLM function calling
Understanding MCP by comparing it with LLM function calling.
The Model Context Protocol (MCP) has been rapidly gaining traction, going viral on social media over the past two weeks. The community has already built dozens of MCP servers across a wide spectrum of domains, extending LLM capabilities with external tools, services, and data sources. For example, the Neon MCP Server allows LLMs to connect directly to Neon projects, creating new projects and database branches and running SQL queries.
If you’re unsure what MCP is or why it matters, this post will walk you through building a small MCP server and comparing it to LLM function calling.
The Example Use Case: Controlling Smart Home Devices with LLM Agents
I’m using Home Assistant to manage my smart home devices. Home Assistant is an open-source home automation platform that I run on a Raspberry Pi. In addition to its admin dashboard, Home Assistant provides a WebSocket API, which we’ll use to control lights with LLM agents.
Want to see it in action? Check out my YouTube walkthrough: MCP vs. Function Calling – Controlling my office lights with Cursor. In this short YouTube video, I showcase the integration by controlling my office lights using both LLM function calling with OpenAI and an MCP server with Cursor.
You can also find the code on GitHub. The repository includes two folders: /func-calling and /mcp-server, both reuse the same Home Assistant utilities: /data-manager and /hass-ws-client. However, these utilities are implementation details that we won’t need to focus on. All we need to know is that we have a controlLight function available. Home Assistant is the example external tool that we want to make available to LLM agents and applications.
LLM Function Calling
Most LLM providers, like OpenAI and Claude, offer a tool-calling API. This allows us to define available functions in JSON and specify their required parameters. For example, using the OpenAI npm package, we can define a chat completion tool array and pass it to OpenAI as part of an LLM request:
import OpenAI from "openai";

const tools: OpenAI.Chat.Completions.ChatCompletionTool[] = [
  {
    type: "function",
    function: {
      name: "control_light",
      description: "Control a light in Home Assistant (turn on/off)",
      parameters: {
        type: "object",
        properties: {
          areaId: {
            type: "string",
            description:
              "The area ID of the light in Home Assistant (e.g., office, kitchen)",
          },
          state: {
            type: "string",
            enum: ["on", "off"],
            description: "Whether to turn the light on or off",
          },
        },
        required: ["areaId", "state"],
        additionalProperties: false,
      },
      strict: true,
    },
  },
];
We define a function called control_light, which requires two parameters: areaId and state. We then pass the tools array to an OpenAI request:
const openAiClient = new OpenAI({
  apiKey: process.env.OPEN_AI_API_KEY,
});

let chatHistory: OpenAI.Chat.ChatCompletionMessageParam[] = [
  {
    role: "system",
    content: `Available area IDs in the system are: ${availableAreaIds}. If the user's request doesn't specify an area, ask them to specify one from this list.`,
  },
];

const completion = await openAiClient.chat.completions.create({
  model: "gpt-4",
  messages: chatHistory,
  tools: tools,
});
Next, we parse the LLM response JSON to check if the model suggests a function call:
const toolCalls = completion.choices[0].message.tool_calls;
if (toolCalls && toolCalls.length) {
  const call = toolCalls[0];
  if (call.function.name === "control_light") {
    const params = JSON.parse(call.function.arguments);
    await handleLightControl(params);
  }
}
If the LLM response contains a toolCalls entry, we parse the function name and arguments, then execute the corresponding function. In this case, the LLM controls my smart home lights.
In the above example, the LLM receives function descriptions in JSON format and determines which function to call, along with its arguments. The application then handles the execution by parsing the LLM response and calling the specified function. In summary, function calling allows developers to register available functions with an LLM, but everything beyond that—function discovery, implementation, and execution flow—is entirely up to us. This means additional abstraction layers are needed to transform function calling into a scalable ecosystem of tools that LLMs can seamlessly integrate with.
Let’s see how the Model Context Protocol (MCP) builds on this concept to provide a higher level of abstraction.
MCP
Rather than building an LLM application with Home Assistant integration code, we can instead build a standalone MCP server that exposes our smart home control utilities to any existing LLM agents like Claude for Desktop, Cursor, Windsurf, or our own custom MCP client. This makes the approach more scalable, allowing us to reuse the same function across multiple LLM apps and agents instead of defining it separately for each one.
Using the MCP SDK npm package, we can create an MCP server in JavaScript:
import { McpServer } from "@modelcontextprotocol/sdk/server/mcp.js";
import { StdioServerTransport } from "@modelcontextprotocol/sdk/server/stdio.js";

const server = new McpServer({
  name: "home-assistant",
  version: "1.0.0",
});

const transport = new StdioServerTransport();
await server.connect(transport);
Once the MCP server is running, MCP clients—including the LLM agents mentioned earlier—can connect to the server, request its capabilities, and use LLM function calling to invoke available functions. To enable this, we need to implement and register the available functions within the MCP server:
import { McpServer } from "@modelcontextprotocol/sdk/server/mcp.js";
import { StdioServerTransport } from "@modelcontextprotocol/sdk/server/stdio.js";
import { z } from 'zod';

const server = new McpServer({
  name: "home-assistant",
  version: "1.0.0",
});

const lightControlSchema = {
  areaId: z
    .string()
    .describe(
      "The area ID of the light in Home Assistant (e.g., office, kitchen)",
    ),
  state: z.enum(["on", "off"]).describe("Whether to turn the light on or off"),
} as const;

// Register the light control function
server.tool(
  "control_light",
  "Control a light in Home Assistant (turn on/off)",
  lightControlSchema,
  async (params) => {
    await handleLightControl(params);
    return {
      content: [
        {
          type: "text",
          text: "Light control command executed successfully",
        },
      ],
    };
  },
);

const transport = new StdioServerTransport();
await server.connect(transport);
We once again define the required parameters, but this time using Zod, a schema declaration and validation library. Next, we register the control_light function with our MCP server.
Depending on the LLM agent you’re using, you may need to compile TypeScript to JavaScript to run it with Node.js, instead of executing the TS code directly with Bun or Deno. Once that’s done, you can register the custom Home Assistant MCP server with your LLM tools.
Here’s an example of how this looks in Cursor:

To set it up, we simply configure a new custom MCP server and specify the Node command to execute the script along with the absolute path to our bundled JavaScript file.
In conclusion, MCP servers act as a bridge between AI applications and third-party services, exposing functions through a standardized protocol that any MCP-compatible LLM can access. MCP extends LLM function calling by separating function definitions from LLM applications. This allows tool builders to create standardized interfaces (MCP servers) for their tools and services, while LLM agents can leverage existing MCP servers instead of reimplementing them from scratch.
If you want to learn more about integrating MCP Servers with MCP-compatible LLMs, we already wrote guides for:
- Using the Postgres MCP Server with Cursor
- Using the Postgres MCP Server with Windsurf
- Using the Postgres MCP Server with Claude Desktop
If you are interested in building your own MCP Client or you want to better understand the flip side of the protocol, check out this guide on Building a CLI Client For Model Context Protocol Servers.